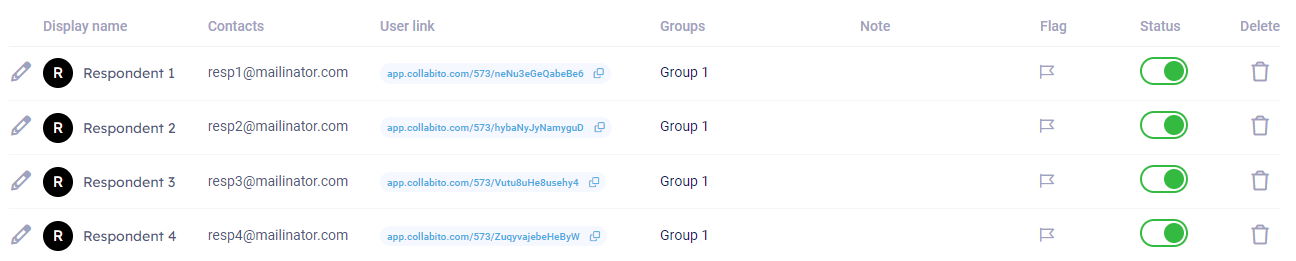
Every respondent has his unique invitation link consisting of a project ID and invitation code. You can find the invitation code in the table of respondents:
Manual invitations
If you prefer to send invitations manually, you can copy the link and paste it into an email and send it to the respondent from your mailbox. When the respondent clicks the link in his email, he will directly enter your study.
Bulk invitations
Sending invitations manually one at a time is fine if you have a small number of participants; but what if you have a large number of respondents? Have no fear-we’ve got you covered with our bulk email module which can send out all invitations in one big batch! The personalization tags are supported so you can include the right user link to each email automatically.
1. Go to the Email section in the blue project menu and click the ‘Add campaign’ button.
2. Select respondents you want to include in the batch, i.e. usually participants from the same session.

If you plan to conduct several focus group sessions, you will probably want to send several batches (campaigns) – one for each group because you’ll want to include a different date or time for the session in the invitation text.
After you have selected the right recipients, click the blue ‘Create campaign’ button.
3. Add email text and adjust the settings:
IMPORTANT: Don’t forget to include the invitation link tag: {url_project_login} .
While sending the email batch, Collabito recognizes this tag and replaces it with the individual user link which is unique for each respondent; for example:
https://app.collabito.com/573/neNu3eGeQabeBe6 in the email for Respondent 1, https://app.collabito.com/573/hybaNyJyNamyguD in the email for Respondent 2, etc.
You can also use another personalization tag {display_name}. If you place it in the greeting line:
Hello {display_name}, the tag will be replaced during the send-out by the display name of the individual respondent (Hello John, Hello Adrian, etc.).
- If you click the Save button, the draft campaign is saved, and you can send it later.
- By clicking the Test email, the system will prompt you for your email and send a test to this email, so you can see how it looks. The invitation link will be replaced by the text TEST URL (not a real invitation link). If you are not satisfied with the email, you can still edit the campaign and improve your text. Try to send the test email to your Gmail mailbox to make sure it’s not identified as spam.
- When you’re sure everything is properly prepared and ready to go in your campaign, simply click the ‘Send to recipients‘ button and this starts the sending process.
The invitations are sent from your email using the ‘via projects@collabito.com’ method. This is done in order to eliminate spam detection. Anti-spam filters don’t like it when someone tries to send emails on someone else’s behalf.
You can also use the emailing module to send reminders or follow-ups. Just create a new email campaign with different texts or recipients.
You can find other useful tips about invitation emails + invitation template in this article:
Invitation email – tips and template
If you’re not sure about any of these instructions, or get stuck trying to prepare and send out your invitations, please don’t hesitate to contact us and we’ll be glad to assist 🙂